Small Frye is a free monthly program for preschoolers and their caregivers. If you are not able to attend, you can check back here every month for a different artmaking activity inspired by the story. To learn more about the program, including how to register, visit our program page.
By Lynda Belt
In February, we read Lucía the Luchadora by Cynthia Leonor Garza and Alyssa Bermudez.
Watch the video and reflect on the story with your child using the questions below.
REFLECTING PROMPTS
How did Lucía feel about herself at the beginning of the book? Do you feel this way too, sometimes?
How did the taunting words from the boys make her feel?
Do you think that her Abuela’s advice helped her? How?
Lucía felt so strong with her mask on. Why do you think she felt this way?
At times Lucía felt “mad, spicy mad.” Why did she feel this way? How did she resolve her feelings?
How did Lucía help the pink crusader who felt so sad? Why was this important for her to do?
Did Lucía feel proud of her “girl power”?
How was Lucia a hero?
ARTMAKING
Lucia felt stronger with her mask on! Sometimes we can put on different clothes to help us feel a certain way—like, pajamas when you want to feel comfy or sleepy, or shorts when you want to feel cooler and be able to move around. For this activity, we’ll make capes that show off all of our superpowers! Like Lucia, we can put on our capes to feel good.
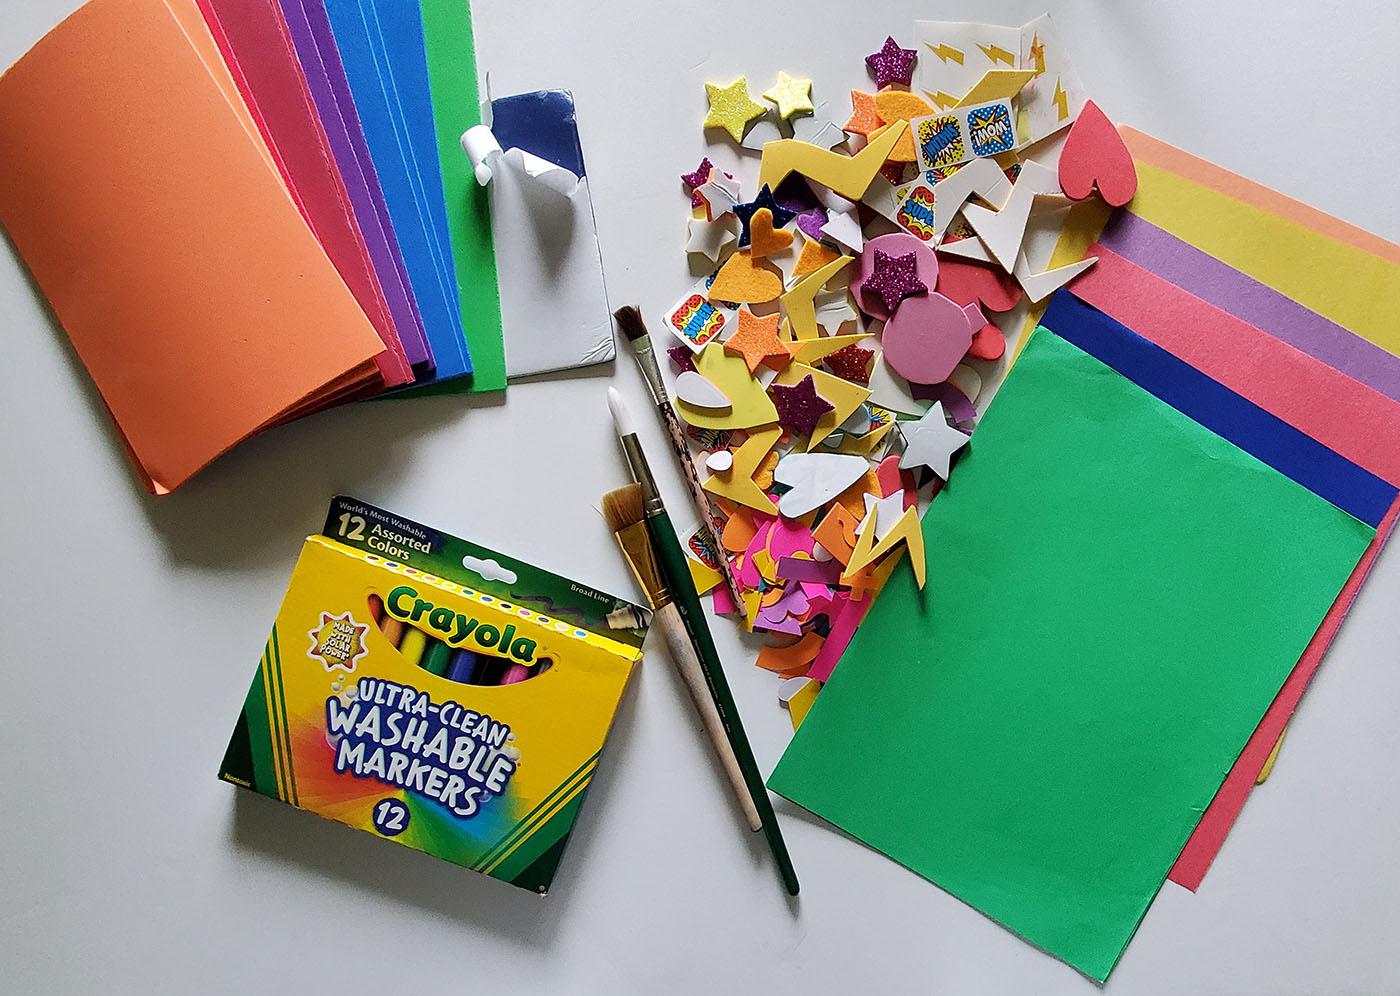
Materials list:
- Cotton muslin—enough to make a cape
- Colored elastic or ribbon for cape ties
- Fabric glue or something to stop the fabric from fraying
- Scissors
- Fabric markers or washable markers
Optional items:
- Hole punch
- Masking tape
- Foam and felt sticker shapes
- Fabric paint or another opaque paint, like tempera or acrylic
- Paint brushes
- Stamps or foam cutouts
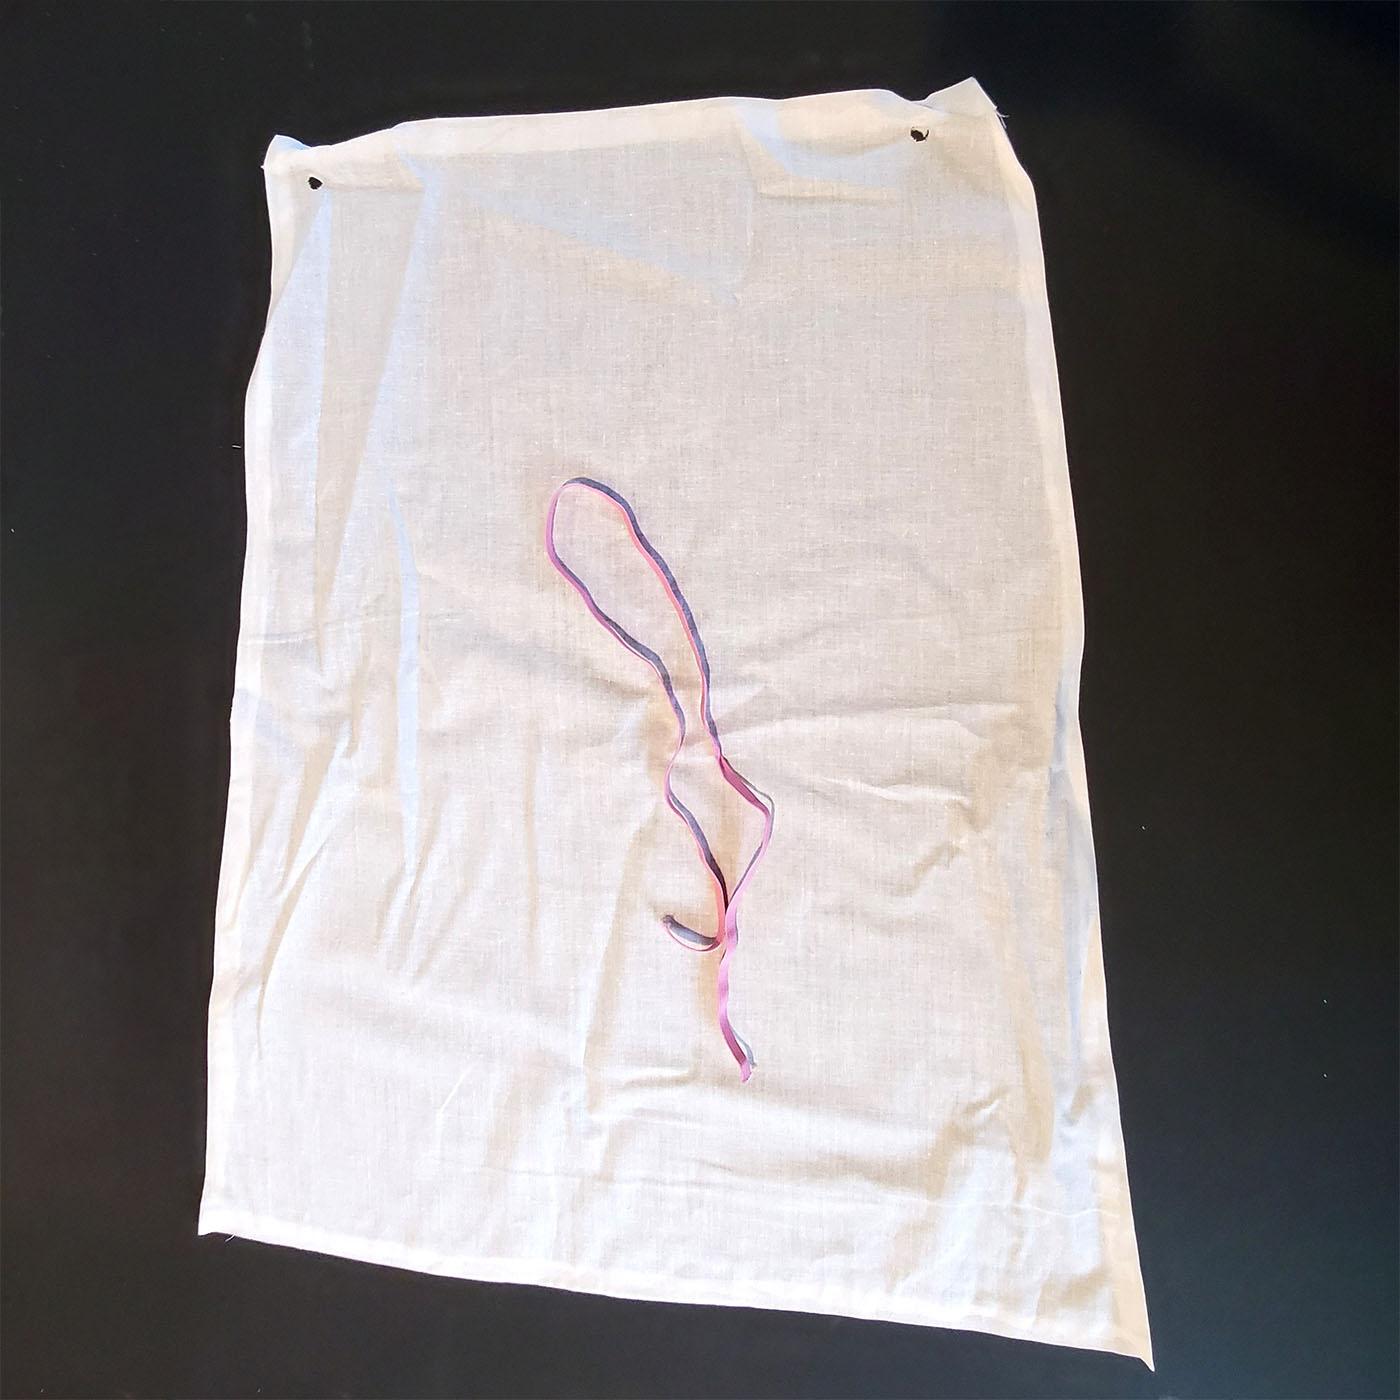
Prepare the cape by cutting a rectangular shape out of muslin. Glue along the edges to prevent fraying. At the top of your cape, punch or cut two holes in either corner and tie your elastic or ribbon (about 5-12" long, depending on material) at the top edge of cape.
The cape is ready to be decorated! Place the cape on flat surface and tape down if needed—this might make it easier to draw on.
Kick off the art activity by talking about shapes, colors, and patterns.
What colors do you want to use on your hero cape?
What shapes do you want to use on your hero cape?
How might you repeat these colors and shapes to make a pattern?
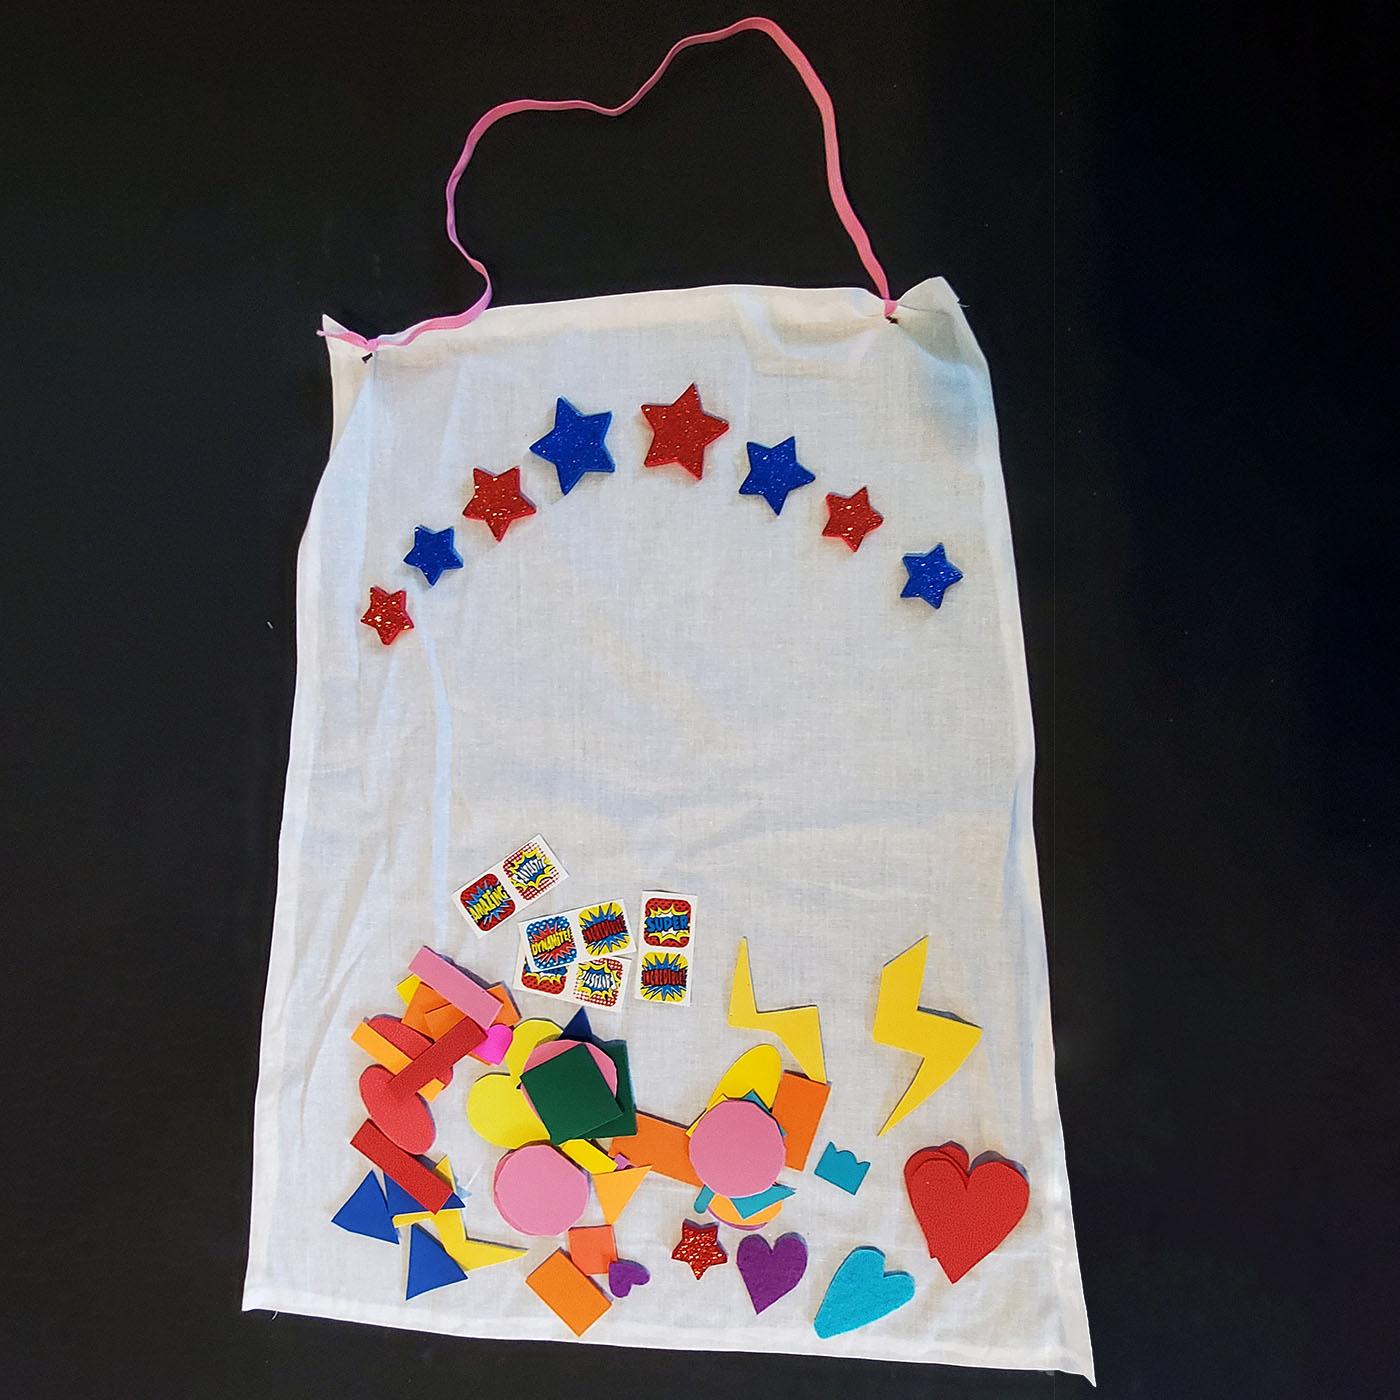
Have your Small Frye draw or name shapes. They can draw directly on their cape with markers and paint or choose different stickers to peel and place on their cape.
Encourage them to repeat their shapes to make a pattern.
They can also decorate the cape with different lines—straight, curvy, or jagged.
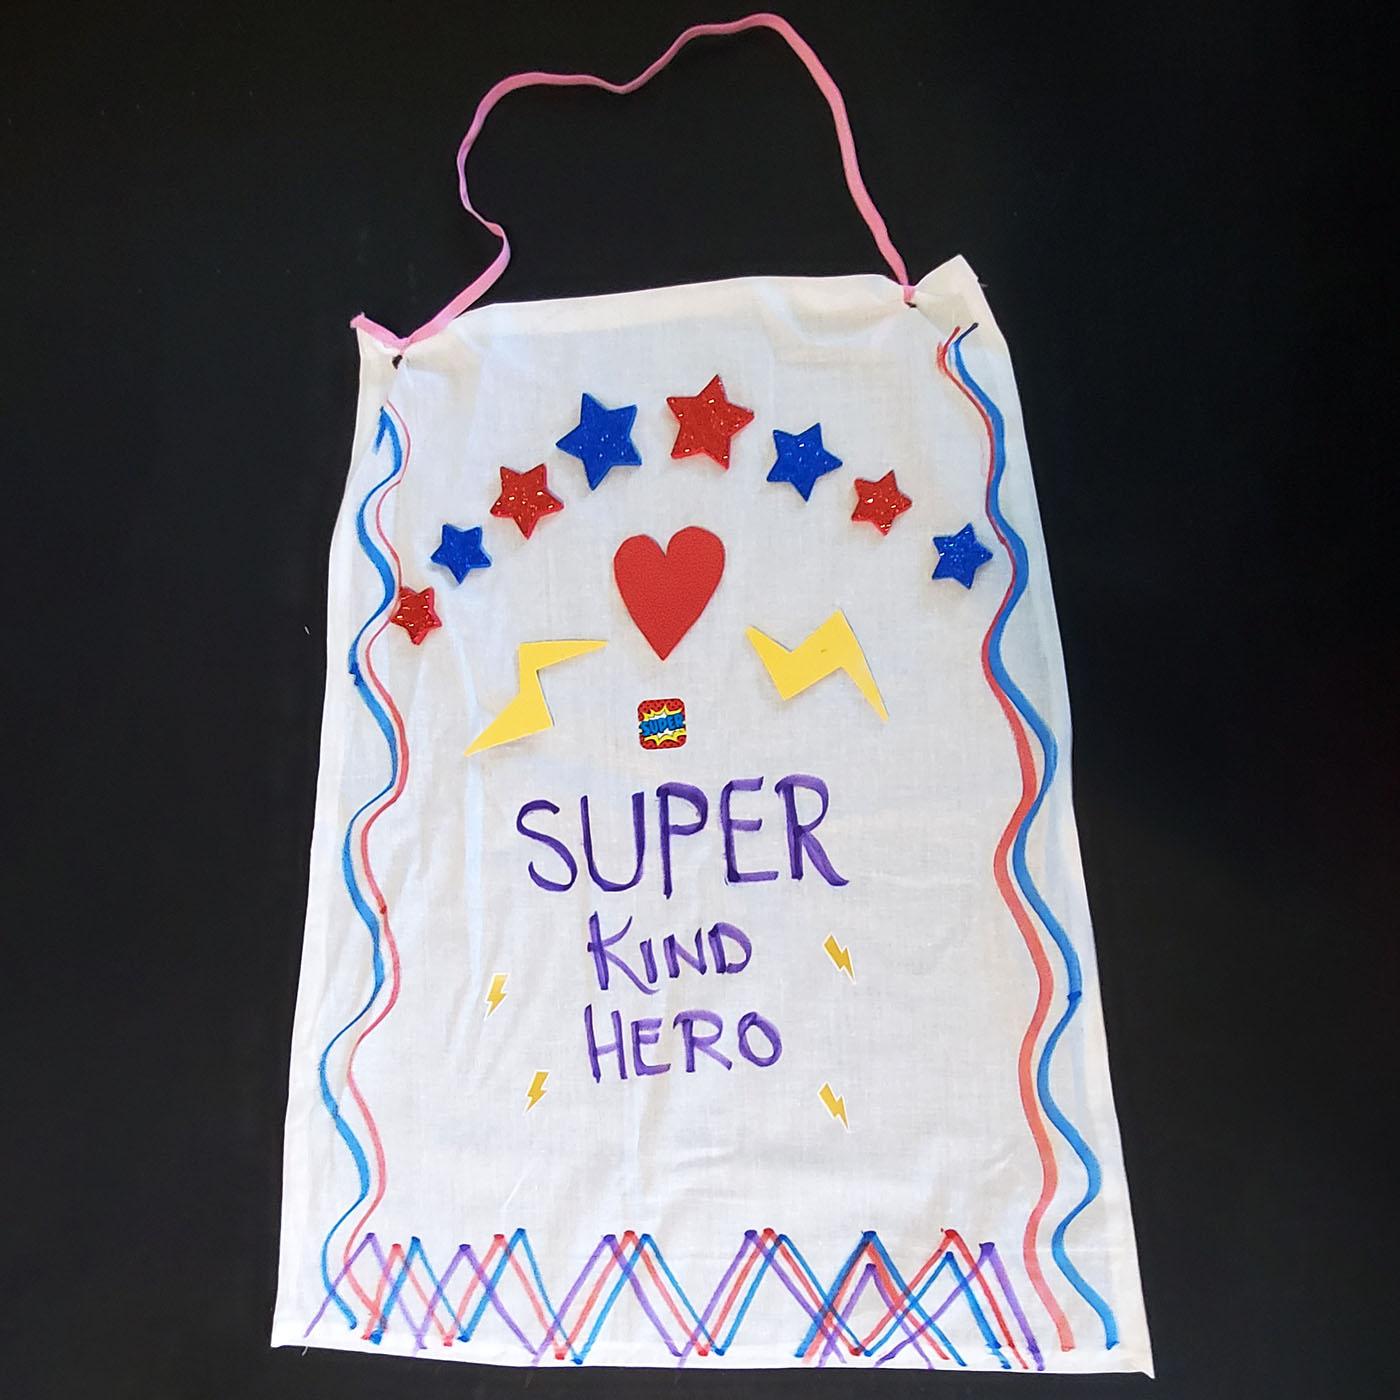
After finishing their Hero cape, reflect with your Small Frye on the process of creating this art project.
How do they feel when wearing their superhero cape?
What poses can make them feel strong, brave, or kind?