Small Frye is a free monthly program for preschoolers and their caregivers. If you are not able to attend with your kiddo, you can check back here every month for a different artmaking activity inspired by a work of art or storybook. To learn more about the program, including how to register, visit our programs page.
In January, we read The Snowy Day by Ezra Jack Keats. Watch the video and reflect on the story with your child using the questions below.
REFLECTING PROMPTS
Can you remember having a snowy day? If your child hasn’t been in the snow, you can describe it, watch a video, or even visit a nearby sno-park.
How did it feel/how might it feel to be in the snow?
What would you wear in the snow? What were some of the things you can do only in the snow?
ARTMAKING
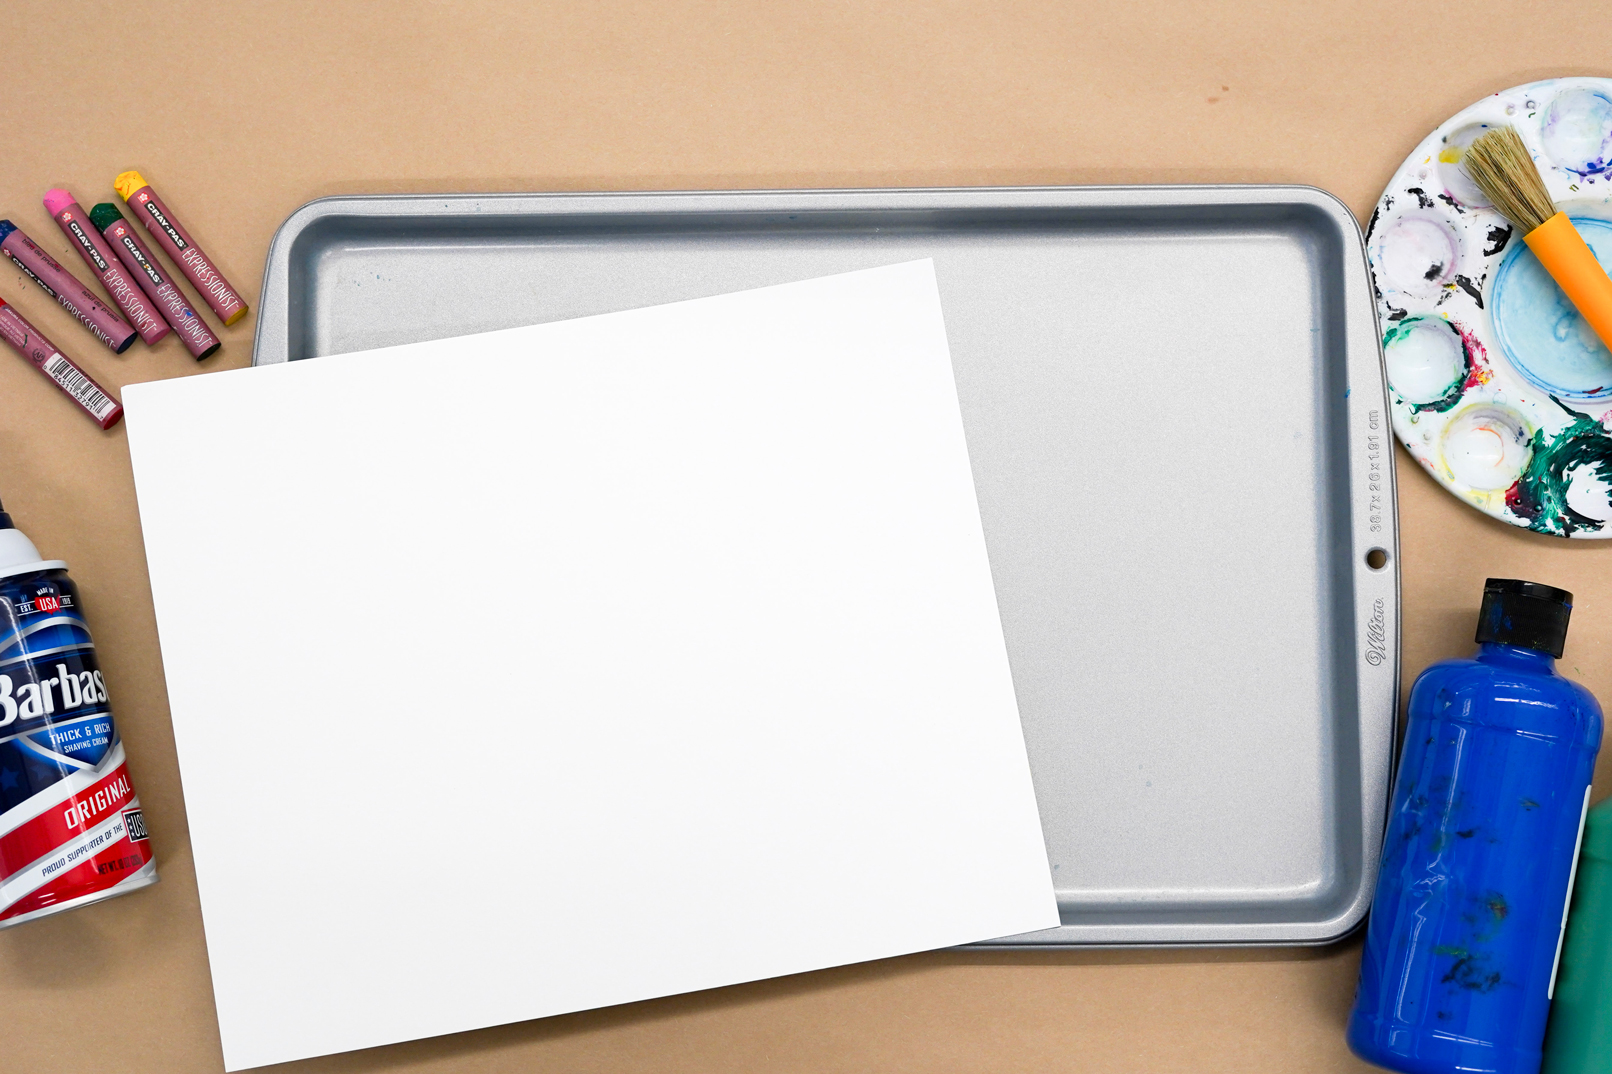
For this art project, we’re going to put ourselves in a snowy day! You will need: a can of shaving cream, acrylic or tempera paint and containers for a few colors, a large paintbrush, a plastic tray, or a baking tray lined with aluminum foil or plastic wrap, large watercolor paper, and crayons or oil pastels.
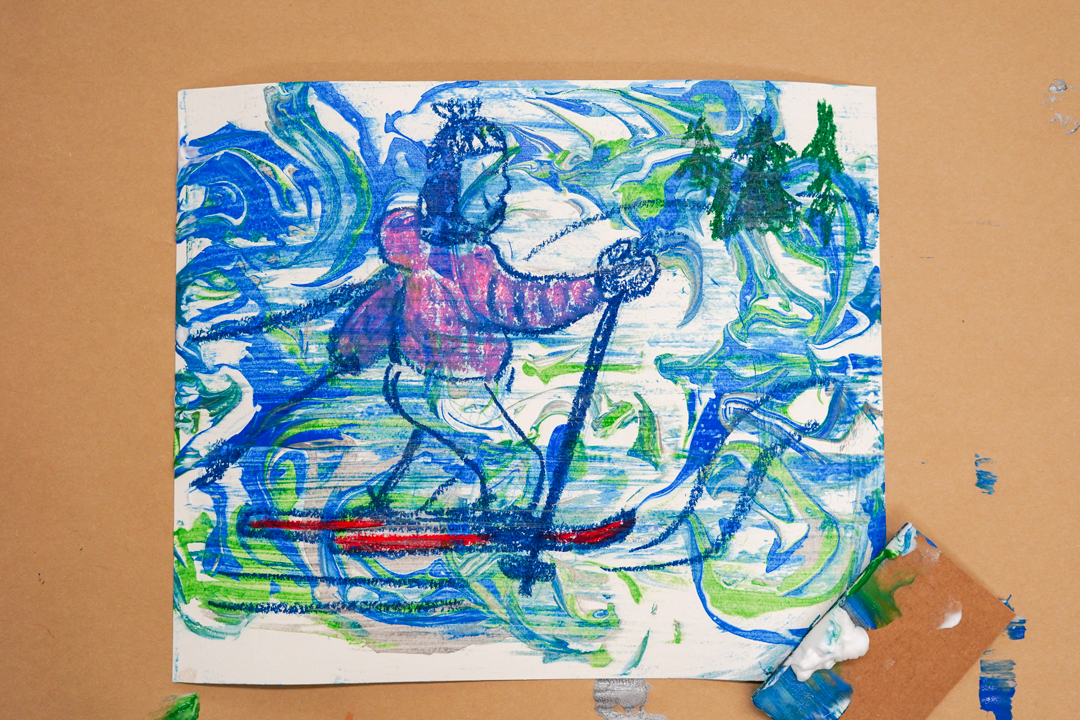
Start by drawing a self-portrait with crayons or oil pastels. Guide your child on their drawing, focus on shape, line, and color. Start with large a circle or oval for their face. Ask them to name each part of their face—eyebrows, eyes, nose, mouth, ears, and hair. Describe the types of lines that they may use, like a curvy line for their ears, a straight line for the bridge of their nose, and maybe curly lines for their hair. Ask them to name the color of their eyes and hair. You can also talk about expression. How did it feel, or how might it feel, if they were in a snow day? Make the expression together with your faces and then talk about how to recreate it for their self-portrait. How would you draw a smiling mouth, surprised eyes, or a cold nose?

Ask your child to add to their self-portrait, remembering or thinking about the clothes they would wear, the things they might do in the snow, or even some landmarks or places they’ve visited with snow.
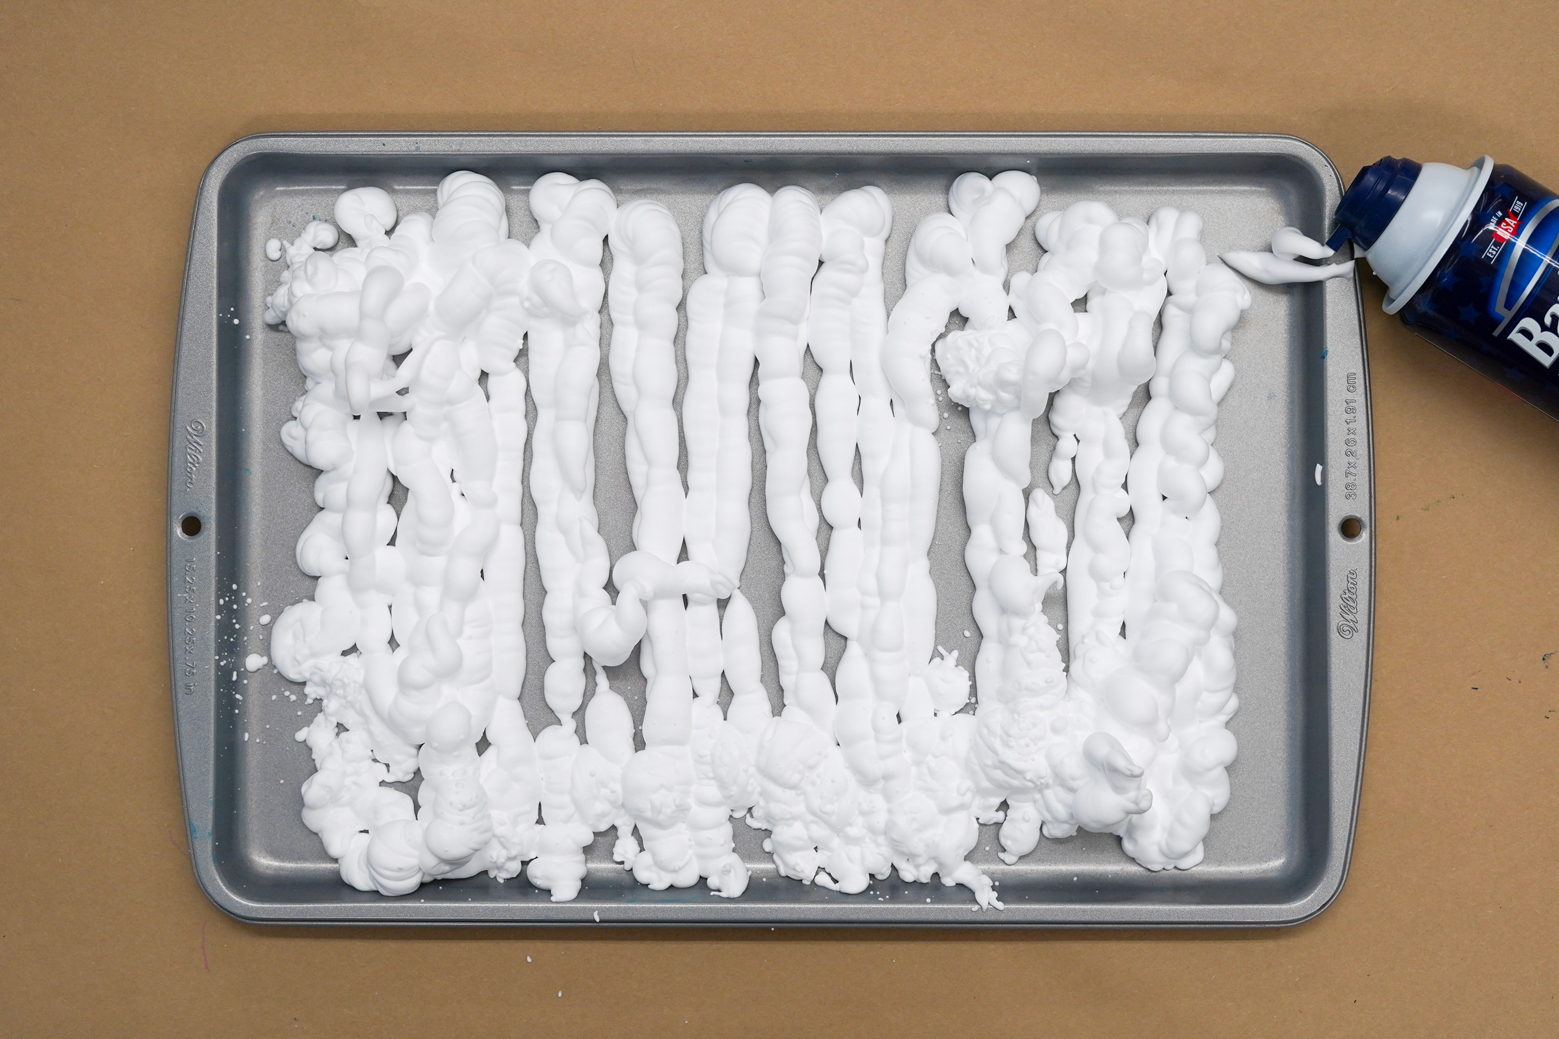
Once your drawing is complete, it’s time to add the snow! Spray the shaving cream covering the tray, using your hands to smooth it out to an even layer of about 1 inch.
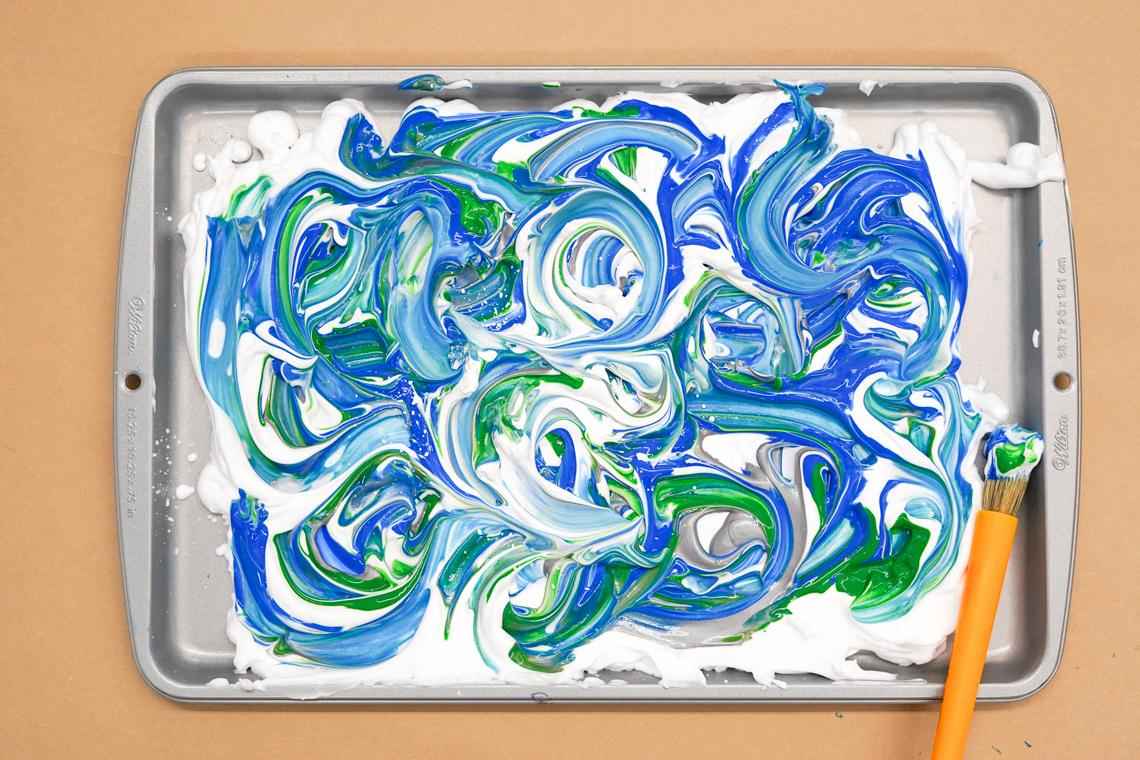
With your paint brush, collect some paint to draw a pattern on top of the shaving cream. Encourage gentle painting, you don’t want to push the brush all the way down to the tray. Keep adding colors, swirls, and designs.

Once your pattern is complete, flip your drawing face-down onto the shaving cream, lightly tapping so that the full sheet makes even contact. Starting at one corner, pull the sheet up slowly. Rinse the paper under a cold faucet or use a squeegee or cut piece of cardboard to scrape the shaving cream away and set aside to dry.